How do I create a Trust Wallet account?
To create a Trust Wallet account, download the app from the official App Store or Google Play, open it, and tap “Create a New Wallet.” Agree to the terms, back up your 12-word recovery phrase securely, and complete the setup by enabling app security features like PIN or biometrics.
Downloading and Installing Trust Wallet
How to Find and Install the Official Trust Wallet App
-
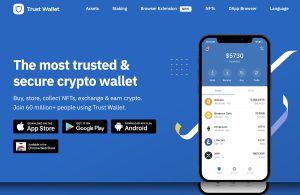
Search the App Store or Google Play: Open the App Store on iOS or Google Play Store on Android and search for “Trust Wallet.” Look for the app with the official blue shield logo and the name “Trust Wallet” published by “Trust Wallet, Inc.”
-
Use the Official Website for Direct Links: To avoid fake apps, visit the official Trust Wallet website and use the direct download links provided there. This ensures that you are installing the authentic and most up-to-date version of the app.
-
Install the App on Your Mobile Device: Tap “Install” or “Get” and allow the app to download and install on your device. Trust Wallet does not require heavy permissions, focusing mainly on necessary functions like internet access and camera for QR code scanning.
Important Checks Before Downloading the App
-
Verify Developer Information: Ensure the app publisher listed is “Trust Wallet, Inc.” on both the App Store and Google Play. Fake apps may have similar names or logos but are often published by unknown developers.
-
Check App Reviews and Ratings: Review the app’s user ratings and feedback. A legitimate Trust Wallet app will have millions of downloads, positive reviews, and consistent updates, which indicates it is trustworthy and well-supported.
-
Avoid Third-Party Download Links: Never download Trust Wallet APKs or installation files from unofficial third-party websites or app stores. These files could be tampered with and expose your crypto assets to theft or malware. Always stick to the official sources.
Creating a New Wallet in Trust Wallet
How to Start the Wallet Creation Process
-
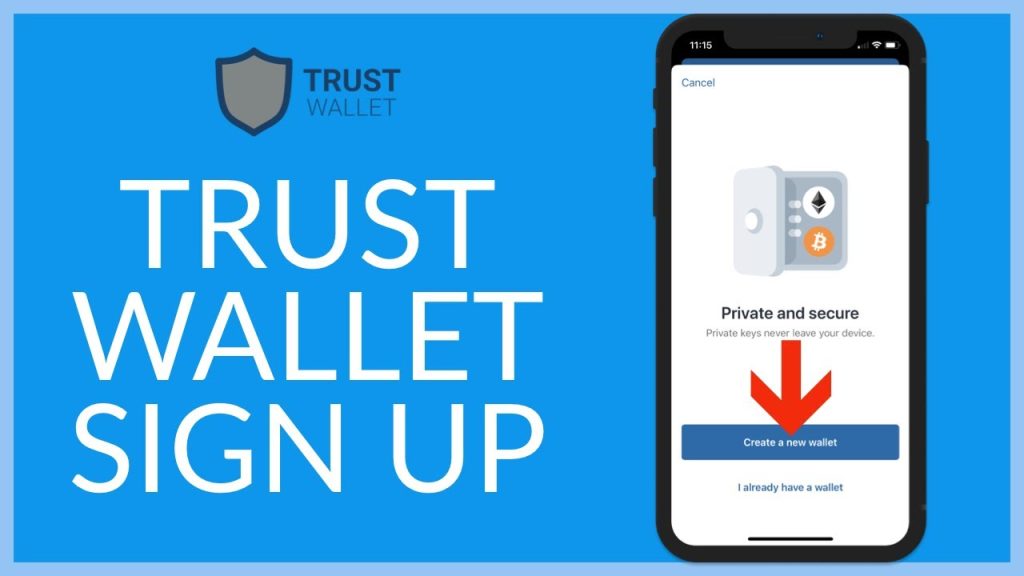
Open the App and Select Create New Wallet: Once Trust Wallet is installed, launch the app and tap on “Create a New Wallet.” This begins the setup process to generate a unique wallet tied only to you.
-
Follow the On-Screen Instructions: Trust Wallet will guide you through initial steps, emphasizing the importance of backing up your recovery phrase. Carefully read each prompt before proceeding to ensure you understand your responsibilities.
-
Prepare to Secure Your Recovery Phrase: Before moving forward, make sure you have a safe and private place to write down your 12-word recovery phrase. This phrase is critical for accessing your wallet if your device is lost or reset.
Accepting Terms and Understanding User Responsibility
-
Agree to Terms and Conditions: During the setup, you must accept Trust Wallet’s terms of service and privacy policy. This confirms that you understand the decentralized nature of the wallet and that you alone are responsible for your assets.
-
Acknowledge No Recovery Options Without Backup: Trust Wallet clearly states that if you lose your recovery phrase, no one, including their support team, can restore your wallet. Users must acknowledge this risk before completing the setup.
-
Take Ownership of Wallet Security: After agreeing to terms, you officially assume full responsibility for the protection of your wallet. Trust Wallet does not store passwords, private keys, or recovery phrases, making personal security practices essential from the beginning.
Securing Your Recovery Phrase
How to Safely Record the 12-Word Recovery Phrase
-
Write It Down on Paper: As soon as the recovery phrase is displayed, write it down manually on paper. Avoid taking screenshots or saving it digitally to reduce the risk of online exposure or hacking.
-
Create Multiple Copies: Prepare two or more handwritten copies of your recovery phrase and store them in separate, secure locations such as different safes or security deposit boxes. This provides a backup in case one copy is lost or damaged.
-
Double-Check for Accuracy: Carefully check the spelling and order of each word after writing it down. A single mistake in the recovery phrase will prevent you from restoring your wallet correctly in the future.
Why Recovery Phrase Protection Is Essential
-
Full Access to Wallet Funds: Your recovery phrase is the only key to accessing your wallet and assets. Anyone with your phrase can control your funds, making it crucial to protect it against theft or accidental loss.
-
Irrecoverable Loss Without the Phrase: Trust Wallet cannot retrieve or reset your recovery phrase. If it is lost and you lose access to your device, your crypto assets will be permanently inaccessible with no recovery options available.
-
Defense Against Scams and Phishing: Scammers may try to trick users into revealing their recovery phrases through fake support channels or websites. Always remember that no legitimate service or staff member will ever ask for your recovery phrase under any circumstances.
Setting Up Additional Security Features
How to Enable PIN or Biometric Lock
-
Access Security Settings in Trust Wallet: Open Trust Wallet, go to the “Settings” menu, and tap on “Security.” From here, you can enable the app lock option to activate additional security layers like PIN codes or biometrics.
-
Set a Strong and Unique PIN Code: Choose a PIN that is not easily guessable, avoiding simple patterns like “1234” or birth dates. This PIN will be required every time you open the app, adding a first line of defense against unauthorized access.
-
Enable Face ID or Fingerprint Authentication: If your device supports biometric security, activate Face ID or fingerprint scanning within the Trust Wallet app. This provides both faster access and stronger protection compared to PIN-only authentication.
Adjusting Auto-Lock Settings for Extra Protection
-
Configure Auto-Lock Timing: Trust Wallet allows users to set an automatic lock after a period of inactivity, such as 30 seconds or 1 minute. Setting a shorter auto-lock time minimizes the risk if the device is left unattended.
-
Require Authentication for Every Access: Enable settings that demand PIN or biometric verification each time the app is accessed, not just when the device is unlocked. This ensures an extra security barrier directly within Trust Wallet.
-
Combine Device-Level Security Measures: In addition to Trust Wallet’s internal security, ensure your mobile device itself is secured with strong passwords, system-level encryption, and regular updates. This layered security approach significantly strengthens protection for your assets.
Adding Cryptocurrencies to Your Wallet
How to Activate Popular Tokens in Trust Wallet
-
Use the Token Management Feature: Open Trust Wallet and tap the filter icon in the top-right corner of the main screen. This opens the token management page where you can search for and activate popular cryptocurrencies.
-
Toggle Tokens On or Off: Search for widely used cryptocurrencies like Bitcoin (BTC), Ethereum (ETH), and BNB. Toggle the switch next to each asset to add it to your main wallet interface for easy viewing and management.
-
Refresh and Update Token List: If a popular token does not appear immediately after receipt, refresh your wallet or update the token list. Trust Wallet frequently updates supported assets, so keeping your app current helps ensure full compatibility.
How to Manually Add Custom Tokens
-
Locate Accurate Token Information: To manually add a custom token, you’ll need details such as the token’s contract address, name, symbol, and decimals. Always gather this information from trusted sources like official project websites.
-
Select the Correct Network: When adding a custom token, make sure you choose the correct blockchain network, such as Ethereum (ERC-20), BNB Smart Chain (BEP-20), or Polygon (MATIC). Incorrect network selection can prevent proper token display and use.
-
Add and Verify Custom Token Details: Enter the token information into Trust Wallet under the “Add Custom Token” option. After adding, verify that the token appears correctly in your wallet and test a small transaction if needed to confirm functionality.